How to Decorate the Perfect Christmas Tree

Are you rockin' around the Christmas tree yet?
Get into the holiday spirit by busting out the decorations and setting up your Christmas tree! We love when this time of year rolls around. The air gets crisper, there's snow on the ground, and it's the perfect excuse to snuggle up by the fireplace and drink all the hot chocolate we want!
But wait. Now that you've dug up your decorations from your basement, where do you begin? If you're like us and add a few new ornaments and decorations to your collection every year, you may feel overwhelmed by the amount of stuff you may have to sort through. Don't worry, follow our step-by-step guide on how to decorate the perfect Christmas tree, and you'll be dancing around your done up tree in no time!
1. Find the right spot for your tree


First things first, you’ll need an outlet nearby to safely plug in your tree.
Consider putting away some furniture to make room for the tree. For us, that meant to temporarily move a floor lamp and small end table to a spare bedroom. When choosing where to put your tree, avoid high-traffic areas, but choose a place that will have high visibility. You don't want to be knocking off ornaments every time you walk by, but you do want to show off your beautiful, sparkling tree for both you, your guests, and even neighbors!
2. The tree skirt

Instead of using a traditional cloth tree skirt, we used a galvanized metal collar (it has no bottom). It’s perfect to hide the electrical cords and the base of the tree. Once the holidays are over, we can use it for one of our indoor trees.
3. The tree height

We have a 6 1/2′ pre-lit faux spruce tree. Although we'd love to smell the fresh pine scent from a real tree, we prefer having an artificial one because it requires far less work (no watering, no dry needles to clean off the floor), and because it's better for the environment. With that said, to each their own! It's a matter of personal preference and family traditions.
When setting up the tree, we realized that it looked a bit too short to fill the wall space behind. To solve this problem, we simply propped the tree up on a box by an extra foot or so, which was perfectly hidden by the collar. Now the tree is 7 1/2′ tall!
4. Fluff up the branches

After spending a year in a box, the tree branches will look pretty flat so they’ll require some major fluffing to bring back its shape. Don’t skip this step, it’s easier to fluff before hanging any ornaments!
Next, turn on the lights to make sure they all work. We know it seems like common sense but you’d be surprised how many people skip this step and regret it.
When decorating the tree, you can either have the lights on or off. We usually decorate with the lights off, and turn them on occasionally as we're adding layers to the tree to assess how the ornaments look when the lights reflect on them. That's the perfectionism in us. We just can't wait long enough for that ta-da moment a the very end! But we know how satisfying that is. After all, it's a tree-lighting ceremony that kicks off the official start to Christmas!
5. Find a decorating theme for your tree

Our living room is decked out in neutrals: grey, black, and white with hints of gold. So naturally, we chose a color palette of white, gold, silver, and champagne for our ornaments. These colors fit in so well with the décor because it enhances what's already there, rather than clashing with it. For example, the traditional red, green and white would not have been the right choice for our space.
6. Make an inventory of what you already have
 Now this is the part that's either super satisfying for the neat freaks (us) or daunting for the less organized. But in either case, it'll make the tree decorating process a lot smoother, so it's worth it!
After unpacking all the ornaments, lay them out on a rug. A soft surface will help you avoid breaking any of them. Lay out the ornaments close to your tree to make it easier to grab as you're decorating.

We took away all the red and green ornaments since we decided they weren’t part of our color scheme (for this year anyway) and sorted out the others by color and size. As you can see, we had a lot of gold ones. Don’t fret, if you can’t use all of your accessories, you can alternate and use them next year.
Then we picked our favorite/prettiest ornaments and reserved them for the outer edges of the branches, so they'd catch your eyes first. The others we used as fillers.
7. Where to hang the ornaments

Start from the top and work your way down. Hang your filler ornaments right inside the tree branches. These literally fill your tree to give it more depth and makes it look fuller. Don’t be afraid to get right in the heart of the tree, where the trunk is.


Here’s the tree with the filler ornaments in place and with the lights on.
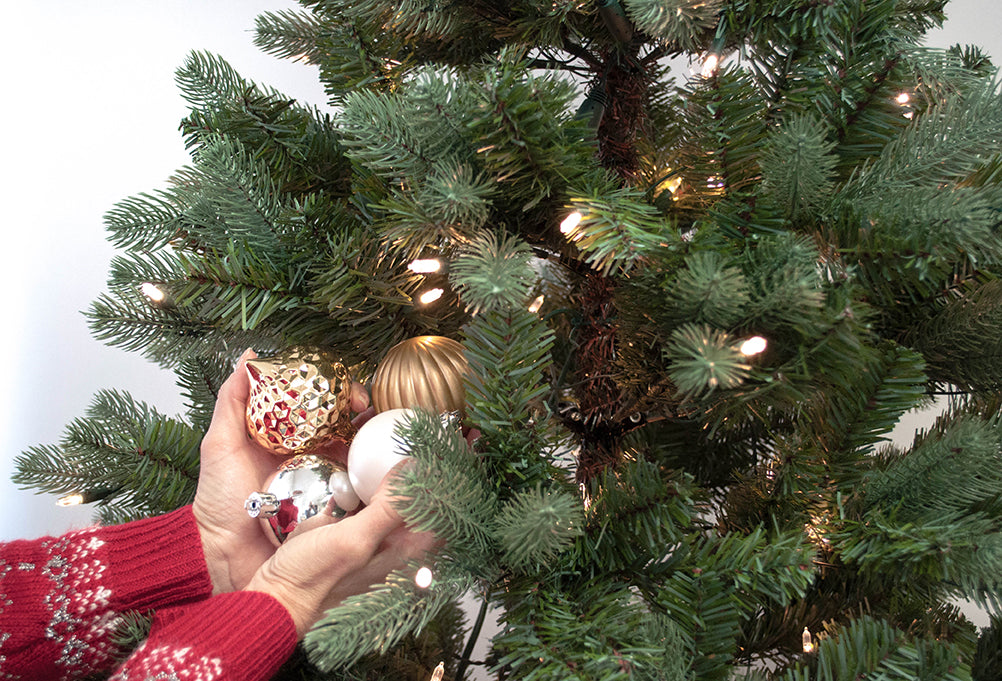
8. Hang your favorite ornaments last

Next, we hung the larger ornaments, and the ones with different shapes and textures on the outer edges of the branches. These are the ones that people will notice the most – your expensive ones!

To add softness to the tree collar, we displayed a garland of pretty little white houses on sheep skins. When it’s on, the light brightens up that corner of the room and creates the perfect ambiance.
9. Tree topper
Finally, we save the best for last: the tree topper. This is the ta-da moment you've been waiting for, so all your hard work pays off. Whether it's a star, an angel, or anything in between, there's no feeling quite like stepping back and admiring the glory of your finished Christmas tree. This is where you can pat yourself on the back!

Get a tree topper that is lightweight. It’ll be perched on the flimsiest part of the tree, so if it’s too heavy it won’t hang straight. It's like the icing on the cake, or the cherry on top of the sundae.
10. Christmas accessorizing

To add a festive touch to the rest of the living room, we added a couple of red cushions that scream Christmas without blatantly saying “Merry Christmas” on them. The look is subtle yet very festive. Check out our mind-blowing tip on how to easily stuff pillows into covers.

Finally, we couldn’t resist adding a red nose and a red and white garland to the reindeer hanging on the gallery wall. It’s playful and so appropriate for the holidays, wouldn’t you say so?

Overall, the look is very simple yet festive but it didn’t require turning the house on its head to get the Christmas look I was after.
How many ornaments are in the tree?

Believe it or not, we have about 100 ornaments on our tree! Remember, some of them you don’t quite see but they do play an important role in filling and brightening the inside of the tree.
A handy Christmas gadget

Hate having to crawl underneath the tree to turn on your Christmas lights? We sure don't love getting poked and prodded by our faux spruce just to reach for the light switch, so this handy gadget takes care of our needs! Treemote is a remote for your tree, and at the flick of a switch, it turns the tree lights on or off without you needing to break out a sweat. Not to mention, it saves you from having to rearrange any fallen ornaments or bent branches from crawling over!
It’s genius! Who would have thought? It works from quite a distance too, so yes you can just imagine kids having fun with it, we did – the big kids.
Planning for next Christmas

If there’s anything you know that needs to be replaced next year, make a list and buy those items at the end of this year. You’ll save a ton of money and you’ll be more than ready for next year.

A few more tree decorating tips you might find very helpful:
- Hang all of the same colored ornaments at once, starting with the fillers. Then move to the next color. It’ll make it easier to spread out the colors and you’ll avoid having two or three of the same colors beside each other.
- Step back occasionally to assess where your tree needs more ornaments. It’s easier to spot the “holes” when you’re further away. You’ll get a well-balanced tree with equal-sized ornaments on the front, the sides, and all around.
- If you can’t see the back of the tree because it’s against the wall, you can hang less ornaments there. Once again, save the prettiest ornaments to display in the prime location, where they can be seen.
-
Wire Christmas ball hooks are easier to hang than ornaments with a string. The height can be adjusted easily and it an be hooked on a branch versus wrapped around it.
- Get green hooks over the silver ones; the green ones disappear into the foliage of the tree and don't stand out like the silver ones.
- Take a picture of your tree before taking it down so that you can easily recreate the same décor next year if you choose too. Trust us, you won’t remember it if you don’t.
- Less is more. Don’t feel like you have to hang every single ornament you own. Alternate every year if you want to.
- Put on your favourite Christmas sweater and play Christmas songs when decorating. It’ll put you in a happy, festive mood and you’ll be completely inspired. We do this every year!
Curious how we hung our gallery wall? Check out our blog on how to hang pictures without messing up your walls.
Have any extra holiday tips? Share them with us down below! Happy tree decorating!


SHARE:
