DIY Your Mantel For Thanksgiving

One of our favorite times of year is almost here, which means it’s time to get your home ready for all the festivities to come. We can't wait for Thanksgiving, one of the warmest family holidays of the year.
Getting the house ready for Thanksgiving doesn’t have to take a whole weekend. A few pumpkins here and there, a flag banner, and you’re ready to go! When pressed for time, just choose one area to decorate (one that guests will see, of course), and focus on that space – a little goes a long way with Thanksgiving décor.
Here’s a quick and easy banner we “made.” (Technically, we purchased it and wrote on it!). We’ve included tips in the instructions to make everything go smoothly.

1. Purchase a blank banner
We bought this flag banner at Walmart for around $3.50. There are 10 flags per banner, so if you think you’ll write a long message, buy 2 banners and some white chalk. (The chalk we used was included in the package with the banner). We were going to write Happy Thanksgiving, but shortened it to “Thankful," because using two banners would have overwhelmed the mantel. Also, if your writing is not steady, stick to a short message.

2. Test-fit and trim your banner if necessary
First, hang the plain banner on the mantel to get a feel for how drapey you want it and to see how to spread the flags. We tried to drape it lower, but the pointy ends of the flags seemed to disappear into the hearth, so we raised it. Since we knew we’d need eight flags to spell “Thankful,” we spread the banner and took the extra two flags off one end of the white ribbon. There are two flags right in the middle and three on either side, and the banner is perfectly draped.
Tip: Save the extra flags, because you could reuse the banner and the extras for another holiday just by writing on the back side.

3. Choose a font and add lettering
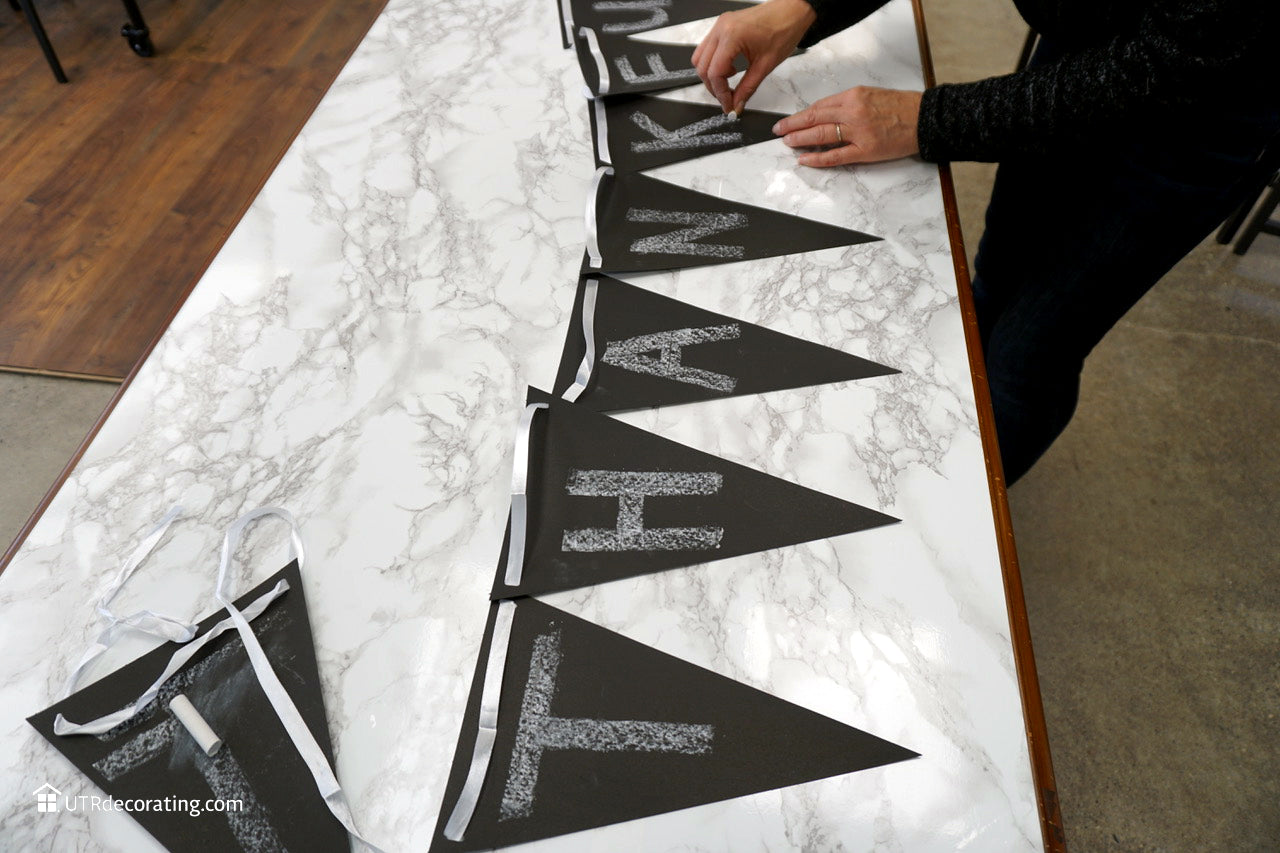
Once you’ve decided what you want to write, decide on the font. Also figure out how high or how low you want the letters to appear on each flag. Yes, a ‘T’ can go much lower into the pointy end of the flag, but an ‘H’ or ‘K’ won’t, so try to center the letters on the flags as best you can. By the way, although you’re using chalk, it can’t be erased; as you can see, we tried and it smudged.

We ended up using a pencil, then traced over with the chalk. We broke a small piece of chalk to use it horizontally to get a thick font that can be read from a distance. Write on a flat surface; start lightly, then darken your letters once you see how they look.
 4. Hang your banner
Next, we taped one end in place and spread the flags across the mantel, making sure the ribbon was not twisted so the flags would hang nice and straight. Then we just taped the second end to the other side of the mantel with clear tape so that it disappeared (you could also use pushpins in drywall for this). The flag tips hang slightly above the hearth and everything looks very uniform.

Voilà! You’re ready to entertain.

About the art...
We bought a poster called “Scooter Love: Romance in Paris," which was inexpensive and looked great against the blue wall. Framed in white, the look is crisp, fresh, and youthful, thanks to all the white space in the poster. And who doesn’t dream of going to Paris? It’s a great conversation piece and a perfect fit.


We love to go all out when decorating for Halloween and Christmas—these are annual rituals we look forward to for months ahead of time. And while Thanksgiving is a time when many of us focus more on food and family than we do on décor, it doesn’t mean we can’t add a little holiday cheer to the home, as you can see.
Until next time!
SHARE:


 4. Hang your banner


