Spring DIY: pastel wall art

This is what you’ll need:
• picture frames of any size or color ( I used a gallery kit I already had)
• dip dyed paper (I bought mine at Michael’s)
• scissors, pencil, utility knife, a cutting mat, and a metal ruler
• notebook: I kept notes as I was doing this project
1. Decide how many picture frames you’ll need and take them apart one at a time.
2. Keeping the paper right side up, play around with the colored paper to find the patch of color you want to showcase.

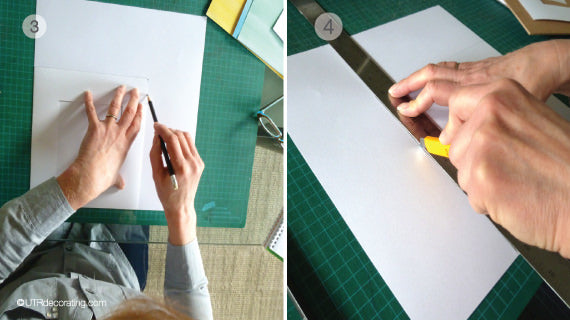
3. Using the largest mat (there were double mats in my frames) trace the outer edge of the mat on the white side of the colored paper.
4. Use a utility knife to cut to size.
5. Reposition all the layers you removed back into each frame, which will keep the artwork in place. I left the original images in each frame so that I can easily swap them back in when I’m ready for a change.
6. Since you cut the image the same size as the mat, no spray adhesive is needed.
Note that I didn’t put the glass back on the frame, since I wanted to reduce the glare when taking the pictures for the article, but you would put the glass back on when recreating this project at home.
Hang up your frames, accessorize, and you’re done. I kept everything neutral in the space to keep the look soft and delicate. I’m very happy with the results and I love how inviting and relaxing this little corner turned out. Take a look at how I hung the frames on this tall narrow wall.
Do you have any DIY wall art ideas you’d like to share?
SHARE:


